The sort of thing you will see upon first starting a game.
Your first step in SotS 2 is to first get acquainted with your starting systems - you begin the game with a minimum of 3 and a maximum of 10. You also begin with 3 fleets (5 fleets if you play as Hiver) - a scouting fleet, a construction fleet, and a colonizing fleet (and 2 gate fleets for Hivers). Each fleet has a number of ships.
In addition to your fleets you start with a Naval Base in orbit around your capitol world. Naval Bases are the only places you can base your fleets, so it's important to keep track of where you build them. To look at your stations, right click a star system and select "Station Manager" or click a star system and select "Station Manager" underneath the system map in the middle left.
In addition to Naval Bases you can also build Civilian, Scientific, and Diplomatic space stations, using your construction fleet.
First Turn[]
Your first turn should be focused on getting production lines going. In general, you should:
- Begin Building a Military Fleet
- Begin Building Infrastructure
- Begin Researching
- Begin Surveying
- Consider colonizing worlds in your currently controlled systems.
Surveying[]
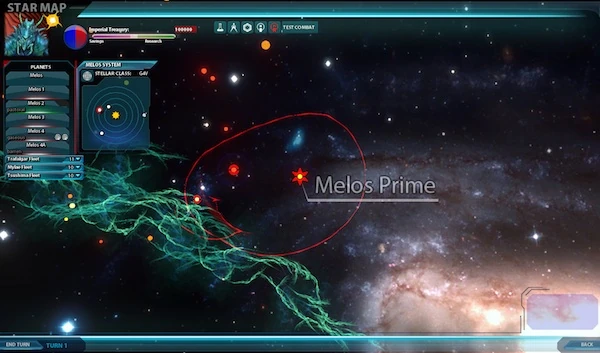
To survey, you right-click a system you haven't visited yet (click a system; if you can see a list of planets (not just the diagram) then you have already scouted that system), and then click "Survey" - select your first survey fleet from the left-hand side, and then click "Confirm Mission" in the bottom right. Your ships will then travel to the system and return to where they came from; a mission is not complete until the fleet has returned.
Researching[]
You should also begin researching technology. Depending on the game settings, you may have started with between 2 and 10 pieces of technology. In the Research Menu (the first button in the toolbar at the top) you can see the different technologies avaliable - you can navigate vertically by right-clicking and dragging up and down, and horizontally by either clicking a technology in a tree next to you or clicking the left and right arrows at the top. A light blue solid line between technologies means that both technologies have been researched; an orange line means that one of the technologies (typically the higher up technology) can be researched but hasn't been researched yet. A blue skinny line between technologies means that you need to first study the feasibility of the technology - this will give you a percentage probability that you can research the technology. Once you have decided on a technology to research, click the lower left button confirming your command.
Choices:
Dependant upon race. It's advisable to think a bit about your gameplay strategy, as it takes a long time to research things - if you're going more combative, energy weapons are a good start. More industrial, look for technologies that boost output - Heavy Platforms, Telekinesis, Expert Systems. More expansionist, look at the biology tree.
Infrastructure[]
Your infrastructure at this point (17369c) is limited to building more naval bases and more research stations . Civilian stations crash at the 2nd tier, and Diplomacy stations reach an upgrade-bug at the 3rd or 4th tier. In addition, trading appears to be broken. Hivers can build gate stations. In 17507 civilian no longer crash at second tier.
To build a station , right-click a system that is surveyed and select "build station", then select a station type in the top left and a building fleet in the bottom left. Then click select placement, and click the icon on the right and a grey circle on the map. Then click commit orders.
Choices:
Dependant upon strategy. If you're going anywhere other than combat, it's worth the delay to build a space station on your capitol world. Otherwise, build naval bases on your other two worlds - you should have a fleet stationed at them in the beginning of the game in case of random encounters or enemy fleets.
Militarization[]
Your military should consist of at least one defensive fleet and one offensive fleet, however you may need to have more defensive fleets if you're fighting in close-quarters or with many random encounters. Essentially you need to be able to move a fleet to a system within one or two turns of warning - that's how many defensive fleets you'll need, minimum, if you're fighting another empire. Random encounters have no warning.
You first have to build the ships of your fleet - select the "Build Ships" icon in the system diagram. This is your ordering form. For a new fleet you need a command and control ship, and several armored ships. Find out which designs have these mission sections by going to the design screen and selecting the pre-built designs on the left. Click the ships and they appear on the invoice form in the lower middle - click a ship and then the garbage bin to get rid of excess ships. You can support 8 ships to one command ship.
If you're thinking of designing a ship, keep in mind the prototyping costs and delays - it costs money to both design a ship and build it, as well as taking a significant amount of time to build it the first time. It's only really worthwhile to do this at the beginning if you started off with a large number of technologies and high capital.
To design a ship , you change the different sections and then the weapon layout of the turrets - click an orange turret and it will give you a selection of the different weapons that can be mounted there. Click the big crossed out areas to add in modules which give different advantages. Once you have designed it, you can weapons test it in the bottom right, or you can submit the design underneath the design selection. A weapons test gives your ship a cardinal set of targets (left, right, forward, back, up, down) that you can shoot at. It is primarily useful to determine two things - range of turrets and reload time. Be sure to determine where your blind spots are, and how long your powerful weapons take to reload.
After invoicing and building your ships, click the fleet manager icon in the system diagram on your main view. Click "Create Fleet" in the lower left, and select an admiral and click "Create Fleet" underneath their name. Name the fleet and click okay. You now have a new fleet, and it has automatically been allocated the command ship you built. Next, click the arrow next to "reserve" in the left sidebar. Click the ship types you built and drag them into your new fleet - if there are too many ships of that type for your command ship, you may have to select individual ships by clicking the arrow next to the type and dragging individual names into your new fleet.
Optionally, you can place your starting layout for ships in the screen. After selecting a fleet in the left sidebar, you can then drag ships onto the numpad - this is the position they will start in in combat. If a ship is not placed, it will start in a line at the back of the fleet.
Combat[]
Combat can occur for several reasons:
- Random Encounters
- Another Civilization's Ships Enter the System
- Enemy Attack
- You Attack
In any case, you need to first and foremost keep your objective in mind - this depends on the situation, obviously, but in general keeping your objective in mind will help you win most of the time. It's easy to get lost in dog-fighting other ships, especially with the pretty graphics, but there are times to dog-fight and times to break enemy lines.
Basics of Combat[]
There are two screens - sensors and visuals. You can toggle between them in the lower left.
Sensors give you more information - they divide the system into concentric regions centered around the star, with the region near to the star being neutral. These regions are colored based on the owner of the region. Neutral regions are transparent (black). Keep this in mind, as it helps you feel out your enemy in the beginning of combat in your own systems - the enemy is in whatever region is not yours. You can convert a region by placing ships in it - to neutral, and then to your own colour. Pin-pointing an enemy is only done when an enemy appears inside your sensor range, which is the blue gradient circles around your ships.
Visuals are more essential to dog-fighting - they give you an idea of what you're fighting, how much damage your ships and their ships have taken, and where you are in the 3-space. However, your view is limited and if your fleet and combat is split in two it can be very distracting.
In both screens you can select ships by clicking them or selecting them with a box, and you can focus on a ship by double-clicking it. You can target other ships by having your ships selected and then clicking them - you can force an attack by alt-clicking them. Right-clicking with your ships selected moves them to that location.
In addition you can issue commands to the selected ships via the command bar at the bottom - the left part of the circle (orange) is speed, the right part of the circle (blue) is height, and the interior four arrows allow you to orient your ships in a particular direction (as "up").
Combat is dictated by a combat timer - between 3 minutes and 12 minutes. In general combat extends beyond one turn, so be prepared to dedicate to it.
Dog-fighting[]
Dog-fighting is pure ship-on-ship combat. At the very basic level, you can have two lines of ships stand-off and shoot each other - however, this will not end combat quickly and your ships will get damaged very fast. More advanced tactics depend on knowing your ship's stats and the enemy's ship's stats - finding blind-spots and putting them in direct-fire spots. Be sure to note the spin option can be used to make quick 180s by giving a command to move half-way through - this lets you break a line, perform a quick turnabout, and then sweep them from behind. In addition you can use the multiple levels and giving different "up" directions to use ships as shields and create cross-fires, though both of these are very buggy as of 17369c.
Tactical Objectives[]
This is a brief list of other objectives you may need to worry about:
- Hiver Gates: If they've built one in your system, destroy it before they bring in more troops
- Command Ships: Kill the admiral, taking away any bonuses.
- Supply Ships: Limit's the fleet's navigation capabilities, possibly strands them.
- Random Encounter Objectives
Colonization[]
Colonization requires alot of resources, even for a simple colonization - it should not be undertaken lightly, especially if you're also researching. Colonization takes two steps:
- Colonizing a planet and feeding it resources from a base
- Building infrastructure
Colonization[]
Actual colonization is done by right-clicking a system, clicking "colonize", selecting a green planet on the top-left, a colonization fleet on the left, and then committing the orders in the bottom right. The fleet will then travel to the system, colonize it, back to it's base, and then back and forth until it is self-sufficient. Colonization is done in two parts - terraforming and building infrastructure. You can alter the amount of output dedicated to each by clicking the colonized system, clicking the planet in either the diagram or the planet list, and then playing with the sliders. In general it doesn't matter, but it can be advantageous to ignore terraforming to build industrial output, or ignore the infrastructure to terraform the planet. Terraforming also lowers how much money you have to spend on the planet per turn, and uses up the biosphere, which is needed to support more citizens.
Infrastructure[]
Much like getting started initially, building the infrastructure of your colony involves building a naval base if needed, and other space-stations. In later versions this will also involve trading, which is currently broken as of 17369c.